Understanding the importance of sharpening serrated knives is crucial for maintaining their effectiveness and longevity. In this guide, we’ll walk you through the process of sharpening a serrated knife, ensuring your blades are always in top condition.

What is a Serrated Knife?
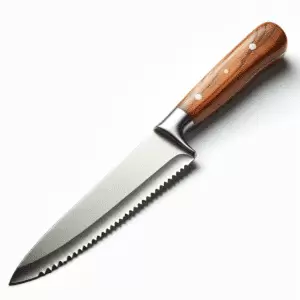
A serrated knife, often referred to as a bread knife, is a type of kitchen knife with a saw-like blade edge. It is characterized by its distinct tooth-like edge, which is excellent for cutting through foods that have a hard exterior and a softer interior. This design allows for easier slicing with less pressure and sawing motion.
Here are some key points about serrated knives:
- Blade Design: The serrated edge is made up of small, sharp, saw-like points, which are spaced out along the length of the blade. This design is what gives it its distinctive cutting ability.
- Uses: Serrated knives are most commonly used for slicing bread, as they can cut through the hard crust without crushing the soft interior. They’re also effective for other foods with similar textures, like tomatoes, and can be used for foods with waxy surfaces, such as bell peppers.
- Durability: The serrated edge tends to stay sharper longer than a straight edge because the points of the serration touch the cutting surface less frequently, reducing wear.
- Cutting Technique: The sawing motion used with serrated knives is different from the slicing motion used with straight-edged knives. This motion is effective for making clean cuts without requiring excessive pressure.
Serrated knives are a valuable tool in the kitchen, especially for tasks that involve cutting through crusty or tough surfaces without damaging the delicate interior.
Recognizing Dullness in Serrated Knives
Recognizing dullness in serrated knives involves paying attention to a few key indicators. Unlike straight-edged knives, where dullness is often more immediately noticeable, the signs in serrated knives can be subtler due to their unique design. Here are some tips to help you identify when your serrated knife is becoming dull:
- Difficulty Cutting Through Bread or Soft Foods: If your serrated knife struggles to cut through bread, especially crusty loaves, or squashes soft foods like tomatoes instead of slicing through them cleanly, it’s likely becoming dull.
- Increased Pressure Required: A sharp serrated knife should do most of the work without needing excessive pressure. If you find yourself applying more force than usual, it’s a sign that the blade is dulling.
- Tearing Instead of Slicing: Observe the texture of the cut. A sharp serrated knife will leave a clean, even cut. If the knife tears the bread or leaves a jagged, uneven cut, it’s an indication of dullness.
- Visual Inspection: Look closely at the serrations. Over time, the tips of the serrations can wear down and become rounded, a visual clue that the knife isn’t as sharp as it should be.
- Sensitivity to Texture Changes: As you use the knife, you might feel a change in how the blade interacts with food surfaces. A blade that once glided through easily might now feel like it’s dragging or catching.
- Inconsistent Performance: If the knife cuts well in some spots but poorly in others, it might indicate uneven wear. This can happen if certain parts of the blade are used more frequently than others.
To maintain the sharpness of your serrated knife, it’s important to use it appropriately (e.g., not using it on hard surfaces or for inappropriate tasks), wash and store it properly, and sharpen it when needed. Regular maintenance will ensure your serrated knife continues to perform effectively.
Tools Required for Sharpening
Sharpening a serrated knife requires specific tools due to the unique shape of its serrations. Here are the primary tools and supplies you might need:
- Serrated Knife Sharpening Rod: This is the most common tool for sharpening serrated knives. It’s a tapered, round sharpening rod that fits into the serrations of the knife. The taper allows it to accommodate different sizes of serrations.
- Ceramic Sharpening Rod: Ceramic rods are preferred by many for their fine grit and the smooth edge they produce. They are excellent for honing and maintaining the edge of a serrated knife.
- Diamond Sharpening Rod: These rods are coated with diamond abrasives, making them very effective for sharpening harder steel blades. They are more abrasive than ceramic rods and can remove more material, making them suitable for knives that are very dull.
- Manual or Electric Serrated Knife Sharpener: Some models are designed specifically for serrated knives. These sharpeners often have a slot designated for serrated blades, ensuring that each serration is correctly sharpened.
- Angle Guide: If you’re using a rod-style sharpener, an angle guide can help you maintain the correct angle while sharpening each serration.
- Cloth or Honing Oil: Depending on the type of rod you use, honing oil may be necessary to lubricate the rod and prevent metal filings from clogging its surface. A cloth is useful for wiping down the knife and rod during and after sharpening.
When sharpening a serrated knife, it’s important to work on each serration individually, matching the rod to the size of the serration. Gentle, consistent strokes are used, and it’s crucial to maintain the correct angle to avoid damaging the blade. The process can be time-consuming, but it’s essential for preserving the effectiveness of the knife. Remember, because of the intricacies involved in sharpening serrated knives, sometimes it might be preferable to seek professional sharpening services, especially for high-quality or expensive knives.

Preparing for Sharpening
Preparing to sharpen a serrated knife involves several steps to ensure safety and effectiveness. Here’s a guide to get you started:
- Choose the Right Sharpening Tool: Select an appropriate sharpening tool for your serrated knife, such as a serrated knife sharpening rod, ceramic or diamond rod, or a specialized serrated knife sharpener. The size of the rod should match the size of the serrations.
- Clean the Knife: Before sharpening, clean the knife thoroughly. Any dirt or residue on the blade can affect the sharpening process. Wash it with warm, soapy water, and dry it completely.
- Set Up a Stable Work Area: Choose a stable, well-lit, and flat surface to work on. Ensure there are no distractions and that you have enough space to work comfortably.
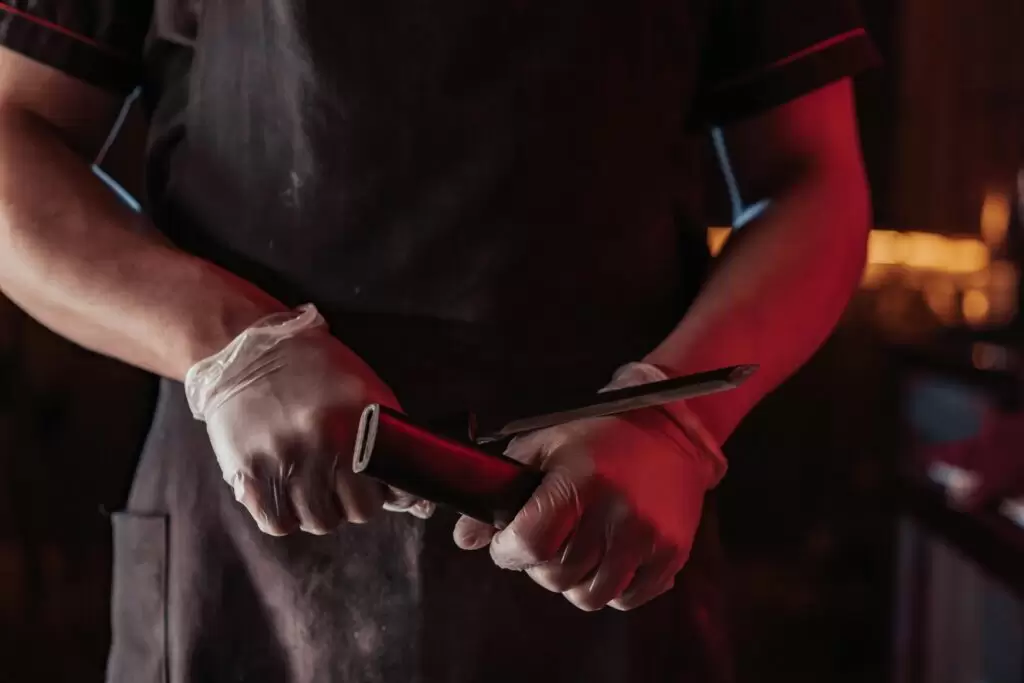
- Safety First: Safety should be your top priority. Consider wearing cut-resistant gloves to protect your hands during the sharpening process. Make sure the knife is securely held, and be mindful of your fingers’ placement to avoid accidents.
- Inspect the Knife: Examine the serrations with a magnifying glass if necessary. Note any damage or particularly dull areas. This inspection will guide you on where to focus your sharpening efforts.
- Prepare Sharpening Supplies: If you’re using a sharpening rod that requires lubrication, prepare your honing oil. Have a clean cloth ready to wipe the blade and rod as needed.
- Determine the Sharpening Angle: Understand the angle at which you need to sharpen the serrations. This is typically the angle at which the serrations were originally ground. An angle guide can be helpful if you’re unsure.
- Practice Technique: If you’re new to sharpening serrated knives, consider practicing your technique on an older or less valuable knife first. This practice can help you get a feel for the motion and pressure required.
By preparing adequately, you’ll set yourself up for a successful sharpening session, ensuring that your serrated knife is restored to its optimal cutting capability. Remember, patience and attention to detail are key when sharpening serrated blades.

Step-by-Step Guide to Sharpening
Sharpening a serrated knife requires a specific approach to ensure each serration is effectively sharpened without damaging the knife. Here’s a step-by-step guide:
Sharpening Process
- Identify the Beveled Edge: Serrated knives are typically only sharpened on the beveled edge, not the flat side. Identify this side for sharpening.
- Start with the First Serration: Begin with the serration closest to the handle.
- Insert the Rod: Place the sharpening rod in the serration. The diameter of the rod should closely match the size of the serration.
- Find the Right Angle: Position the rod at the same angle as the bevel of the serration. This is usually around 13-17 degrees but may vary.
- Use Gentle Strokes: Stroke the rod gently through the serration, away from the edge, using light pressure. Around 5-10 strokes per serration should suffice.
- Repeat for Each Serration: Move along the blade, sharpening each serration with the same number of strokes to ensure uniform sharpness.
- Wipe the Blade: Regularly wipe the blade with a cloth to remove metal filings.
Finishing Up
- Check Sharpness: After sharpening all serrations, test the knife on a piece of paper or bread to ensure it’s sharp.
- Clean the Knife and Tool: Clean the knife and the sharpening tool to remove any metal filings.
- Store Properly: Store the knife in a safe place, preferably in a knife block or sheath to protect the edge.
Additional Tips
- Be patient and maintain a consistent angle and pressure as you sharpen each serration.
- Do not apply too much pressure, as it can damage the serrations.
- If your knife has very small or irregular serrations that the rod does not fit into, consider seeking professional sharpening services.
- Remember, the flat side of the serrated knife typically does not need sharpening. However, you can lightly run a fine-grit stone or honing rod along this side to remove any burrs if necessary.
Maintaining Your Serrated Knife
Maintaining a serrated knife is crucial for ensuring its longevity and optimal performance. Here are some key steps and tips for proper maintenance:
Regular Cleaning
- Clean After Use: Always clean your serrated knife immediately after use. Rinse it under warm water and use a mild dish soap to remove any food particles.
- Gentle Scrubbing: Use a soft sponge or cloth. Avoid abrasive scrubbers, as they can damage the blade.
- Dry Thoroughly: After washing, dry the knife immediately with a towel to prevent rusting or water spots.
Proper Storage
- Knife Block or Sheath: Store your serrated knife in a knife block, sheath, or magnetic strip. Avoid throwing it in a drawer where it can get bumped and dulled.
- Avoid Moisture: Store in a dry place. Excess moisture can lead to rusting, especially for high-carbon steel knives.
Regular Sharpening
- Sharpen Regularly: Sharpen your serrated knife when you notice it’s not performing as well. This might not be as frequent as your straight-edged knives, but it’s still important.
- Use the Correct Tools: Use a serrated knife sharpening rod or take it to a professional for sharpening.
Safe Usage
- Right Task for the Right Knife: Use your serrated knife for its intended purposes, such as cutting bread or soft vegetables. Avoid using it on hard materials.
- Cutting Surface Matters: Use a proper cutting board – wood or plastic is ideal. Hard surfaces like glass or metal can dull the blade.
Inspections
- Regular Check-Ups: Periodically inspect the knife for any signs of wear or damage, like bent serrations or chips.
Honing
- Honing: While honing a serrated knife is less common, you can run a honing steel lightly on the flat side of the knife to realign any minor bends. Avoid honing the serrated side as it can damage the serrations.
Rust Prevention
- Rust Prevention: If your knife is prone to rust (like high carbon steel knives), consider using a light food-safe mineral oil on the blade to help prevent rusting.
By following these steps, your serrated knife can remain sharp, effective, and in good condition for years to come. Remember, the key to maintaining any knife is regular care and proper usage.
Common Mistakes to Avoid
Sharpening a serrated knife requires a specific technique, and there are several common mistakes you should avoid to maintain the effectiveness and longevity of your knife. Here are some of the key ones:
- Using the Wrong Sharpening Tool: Using a regular knife sharpener or the wrong size sharpening rod can damage the serrations. Always use a sharpening tool specifically designed for serrated knives, with a diameter that matches the size of the serrations.
- Over-Sharpening: Applying too much pressure or sharpening too frequently can wear down the serrations more quickly. Gentle, controlled strokes are sufficient.
- Sharpening the Wrong Side: Serrated knives are typically only sharpened on the beveled edge, not the flat side. Sharpening the flat side can ruin the serrations.
- Ignoring the Angle: Not maintaining the correct angle can lead to uneven sharpening and potential damage to the knife. The angle should match the original angle of the serrations.
- Neglecting Individual Serrations: Each serration needs individual attention. Skipping serrations or not thoroughly sharpening each one will result in an unevenly sharpened knife.
- Using a Dull Sharpening Tool: A dull sharpening rod or stone won’t effectively sharpen the knife and could cause damage. Ensure your sharpening tools are in good condition.
- Forgetting to Clean the Knife Beforehand: Sharpening a dirty knife can lead to poor results and potentially damage the sharpening tool. Always clean the knife thoroughly before sharpening.
- Inconsistent Sharpening Strokes: Inconsistent strokes or alternating directions can lead to uneven sharpening. Use consistent, unidirectional strokes for each serration.
- Ignoring Manufacturer’s Instructions: Some knives come with specific sharpening instructions. Ignoring these can lead to improper sharpening and potential damage.
- Not Testing the Knife After Sharpening: Always test the knife after sharpening to ensure it’s been done correctly and the knife is performing well.
- Rushing the Process: Sharpening a serrated knife takes patience and attention to detail. Rushing can lead to mistakes and potential injury.
Avoiding these common mistakes will help ensure that your serrated knife is properly maintained and remains sharp and effective for your cutting needs.
When to Seek Professional Sharpening
Seeking professional sharpening for your serrated knife is sometimes the best option, especially in certain situations. Here are key instances when you should consider professional services:
- High-Quality or Expensive Knives: If your serrated knife is a high-end model or an expensive investment, professional sharpening can ensure that it is cared for properly, preserving its quality and extending its lifespan.
- Lack of Proper Tools or Skills: If you don’t have the appropriate sharpening tools or are unsure about how to properly sharpen a serrated knife, it’s wise to seek professional help to avoid damaging the knife.
- Severely Dull or Damaged Knives: If your knife is significantly dull or has damaged serrations, a professional sharpener will have the tools and expertise to restore its edge, which might be challenging to achieve at home.
- Specialized Blade Types: Some serrated knives have unique or intricate serration patterns that require specialized sharpening techniques, which professional sharpeners are more likely to be familiar with.
- Regular Maintenance for Professional Use: If you use your serrated knife frequently, especially in a professional setting like a restaurant, regular professional sharpening ensures the knife performs at its best at all times.
- Uncertainty about Sharpening Frequency: Professionals can advise on how often your specific type of serrated knife should be sharpened based on its use and the material it’s made from.
- Convenience: If you prefer not to invest time and effort in learning the sharpening process, professional services offer a convenient alternative.
- Preservation of Warranty: Some knives come with a warranty that might be voided if the knife isn’t sharpened by a professional or according to the manufacturer’s guidelines.
When choosing a professional sharpening service, look for one with good reviews and experience with serrated knives. A skilled sharpener will not only sharpen your knife but can also provide valuable advice on maintenance and care. Remember, the frequency of professional sharpening will depend on how often you use your knife and what you use it for.
FAQs
How often should I sharpen my serrated knife?
The frequency of sharpening a serrated knife depends on several factors, including how often you use it, what you use it for, and the quality of the knife. Unlike straight-edged knives, serrated knives don’t require sharpening as often due to their design and cutting technique.
Can I use a regular knife sharpener for a serrated knife?
No. Using a regular knife sharpener for a serrated knife is generally not recommended, as it may not effectively sharpen the serrated edge and could potentially damage the knife.
How do I know if I’ve sharpened each serration adequately?
Determining whether each serration on your serrated knife has been adequately sharpened involves a combination of visual inspection, tactile feedback, and testing the knife’s performance.
Is it safe to sharpen serrated knives at home?
Yes, it is safe to sharpen serrated knives at home, provided you follow proper techniques and safety precautions. Sharpening serrated knives at home can be a bit more challenging than sharpening straight-edged knives due to their unique toothed design, but with the right tools and methods, it can be done effectively and safely.
What are the risks of improperly sharpening a serrated knife?
Improperly sharpening a serrated knife can lead to several risks and issues, both for the knife itself and for the user. To minimize these risks, it’s important to use the correct tools and techniques specific to serrated knives. If you’re unsure or uncomfortable with sharpening a serrated knife yourself, it may be best to seek out professional sharpening services.
